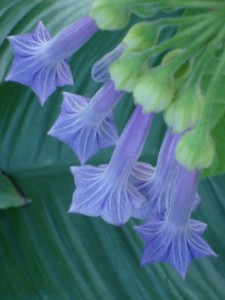
 Pollinating Iochroma is like doing brain surgery. You need tools and a lot of patience. In their native habitat, Iochroma flowers are pollinated by hummingbirds, so consider that as you tackle this delicate task.
Supplies for pollinating Iochroma:
Small jewelry string tags (the kind used for pricing rings). Iris forceps (small, lightweight tweezers with fine points). An Exacto Knife with clean blade. Artist’s paintbrush with fine sable hairs. A fine point Sharpie pen. A magnifying glass A small tray for carrying your supplies from plant to plant. Small bottle of alcohol for cleaning your brush after each pollination procedure. A paper towel for drying your brush after cleaning.
OK. Let’s pollinate!
The Procedure
Iochroma are self-fertilizers. If you don’t catch a bloom in time, the little rascals pollinate all by themselves. So, the only thing to do is catch your flower beforeit does your job for you.
1 – Find your Flower – your ideal flower for pollination is one that looks like it will open fully tomorrow. When you look inside the flower, the anthers have no visible pollen present.
2 – Slit the flower lengthwise with your Exacto knife, and remove all the anthers.
3 – Locate the stigma – The stigma is a tiny green spot at the end of the style. It is usually located in the center of the flower.
4 – Load your brush with pollen from another Iochroma variety.
5 – Carefully daub the stima with pollen. You may need to use your magnifying glass to make sure pollen has adhered to the style.
6 – Mark the name of your cross on one of the string tags and loop it around the base of the flower.
See? I told you this is brain surgery! 🙂
7 – Place your plant in a protected area where bees or insects won’t have access to your plant.
Collecting Seed
Within a few days of the pollination procedure, your pollinated flower will drop it’s tube, leaving a fertilized ovary behind. Unlike Brugmansia, which develop big pods crammed with seed, Iochroma produces berries. Each berry contains about 50 or so very tiny seeds. As the berry ripens, so do the seeds. When the berry is ripe and quite squishy, it falls from the plant. Here’s where you swing into action. You have to monitor the berry’s ripeness and harvest it before it hits the ground, otherwise, you won’t know what you’ve crossed to that particular berry. Experience will tell you when the exact moment presents, but a good rule of thumb is – the squishier, the better.
Grab a paper towel, your Exacto knife, and your magnifying glass. Its surgery time again! Lay out the paper towel on your working surface. Place the ripened berry on the paper towel and cut it into four parts. You should see tiny seeds of various sizes inside. Carefully scrape them onto your Exacto knife, then wipe them on the paper towel. Leave the seeds to dry for a couple of days.
Planting Iochroma Seed
More brain surgery. Fill a small container with a fine, peat-based, grow mix. Fill a spray bottle with a mix of water and mild fungicide. Moisten the grow mix, but don’t saturate it. Sprinkle your seed on top of the mix and press in place. Do not cover the seed! Iochroma seeds need light for germination to occur!
Within a few days sprouts should appear. They’re going to be minute little guys, so give them time to grow a few inches before you transplant them to a light soil mix of about 50/50 Perlite to potting soil. Keep them moist, but not wet. Iochroma dislike being very wet at the outset, so spray them and their soil when the mix looks like it’s getting on the dry side.
Enjoy the adventure. After this, you might want to consider going to medical school! LOL!


